Let's Start Engraving
One of my goals for 2014 is learning to engrave metal. So here the fun begins.
Along with investing some 2013 profits back into my business by getting a ball vise I also splurged on a Lindsay Airgraver system. Yes I did get a really nice Christmas gift for myself :) The tax deductible kind of gift. I tried my hand at hand push engraving a tiny bit before and it's tough. The power assist gravers are supposed to be much, much easier to learn. I am all for learning things quickly with the right tools.
I haven't had much time yet to play with it since orders need to be finished and taxes need to be done. But I did manage to set up the system and play around a tiny bit. Here the first practice runs on some copper sheet.

It's certainly much, much easier to control a power assist graver. I slip less, which leads to less injuries. Never fun driving a sharp steel tool into one's hand. But I still need to get a feel for holding the graver at the right angle, play with power settings and get a better flow overall. Straight lines are easier than curves, scrolls and circles are really tough. It always looks so easy when watching tutorials on Youtube. Well it isn't easy at all. But it certainly is fun, a lot of fun actually.

Here the tools that give the power: air compressor and regulators.
I am glad I got the Silentaire compressor. It's amazing how quite it is. The Airgraver set I got is the Foot Control Classic engraving set. I can upgrade to the palm control later if I feel the need for it.

It did come with some basic sharpening templates, four diamond bench stones (260, 600, 1200, 2000) and lot's of square graver blanks. Luckily it also did come with one already sharpened square graver to try right away. Last weekend I finally tried to sharpen one myself. Takes some getting used to it but the templates make it fairly easy. The video and instructions are good to follow.


Left the one I sharpened myself, right side the one that came already sharpened with my purchase.
I guess I have to grind the top facet more to make the face smaller.
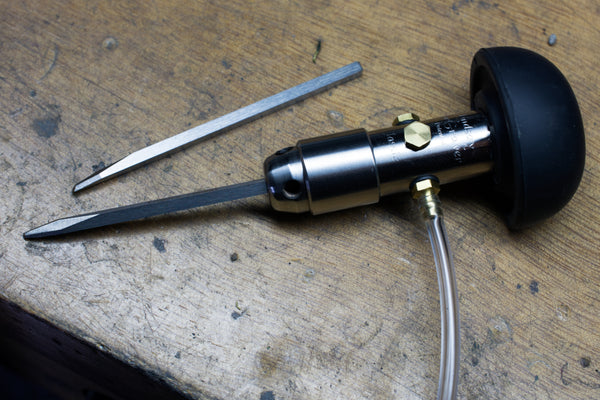
The Lindsay Classic handpiece.
I think I like that the square gravers just slip into the handpiece without the need to get those collets on each one like the GRS systems seem to work. It still is possible to also just slip some of the pre-sharpened GRS gravers in there, I did try it with a few I had on my bench. Next step for me is to sharpen a few other shapes with the sharpening templates and play a bit more around on some brass and copper sheet. Here the last practice sheet I did trying to work with straight and slightly curved lines. Quite wobbly still with uneven depth and width of the lines.

I did sign up for the EM Charm Swap and I think I will do something with engraving. It forces me to get my act together since the deadline for the charms is in March. No pressure, right? Plus having to do 22 charms will give me lot's of practice. I started sketching and doodling a bit to think about possible patterns and textures. Right now I am maybe leaning towards round charms with a line pattern and maybe some stone or colored metal accents.

Not sure yet which materials I will choose. It certainly could look great as sterling silver charms with gold accents and nice tube or flush set faceted melee stones. But that's probably getting a bit too expensive. So maybe the color accents are just brass dots. But I need to get better with the patterns first before I even need to worry about the materials. Hope to find some time to play more next weekend.